.jpg)
From Image to High-Detail 3D Print: A Step-by-Step Guide to Converting Images to STL and Refining with Blender
Imagine transforming a simple 2D image - like a cherished photo, a unique design, or a favorite logo - into a 3D model ready for printing. With advancements in AI-powered tools and open-source software, converting images to STL files for 3D printing is now more accessible than ever. By using Meshy to streamline the conversion process, CGDream.ai to generate unique starting images, and Blender to refine details, anyone can produce high-quality models ready for printing.
In this guide, we’ll walk through each step, from choosing the right image to enhancing your model with professional-grade details, making it ideal for hobbyists and professionals alike.
Why Convert Images to STL for 3D Printing?
Converting images to STL files opens a new world of creative possibilities. You can bring your favorite visuals to life as 3D-printed objects, whether you want to make a customized gift, create personal keepsakes, or even bring artistic ideas into physical form.
Plus, with tools like CGDream.ai’s AI-powered image generator, creating a unique or artistic starting image for 3D printing is simple. This, combined with Meshy’s image-to-3D conversion, makes the entire process straightforward, even for beginners.
Converting a 2D Image to an STL File Using Meshy
This process is as straightforward as uploading an image, adjusting settings, and downloading the STL file - no technical expertise required. Enhancing your images before the conversion process can significantly improve 3D model quality. Using an AI photo editor allows you to fine-tune details, sharpen features, and adjust image clarity, making them more suitable for accurate STL conversion. Here’s how to get started:
Step 1: Choose the Right Image
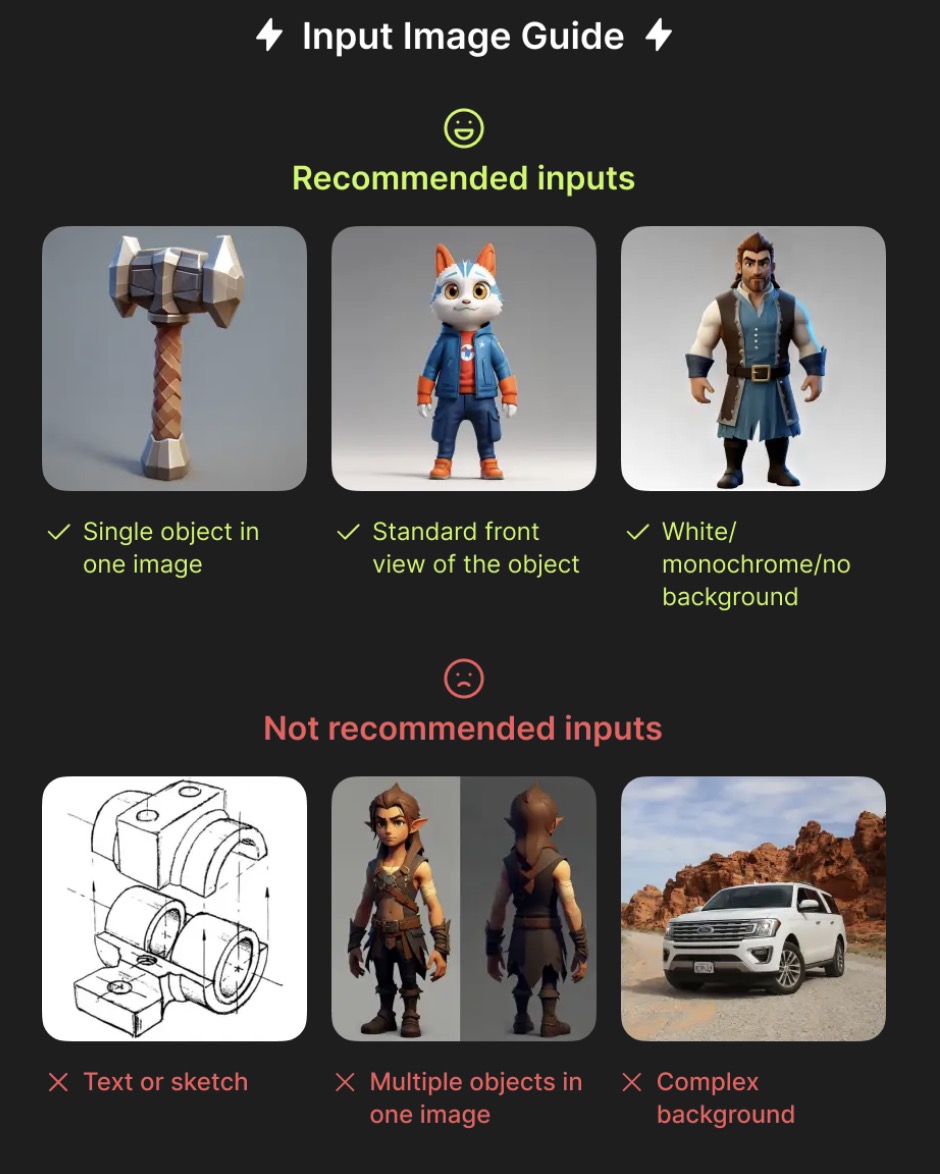
Select an image with clear contrast and a simple background. High-resolution images with distinct elements make for better 3D models. If you’re looking for an image or need a creative spark, try generating one with CGDream.ai, an AI-powered tool that allows you to create custom visuals tailored to your ideas.
Step 2: Upload and Convert in Meshy
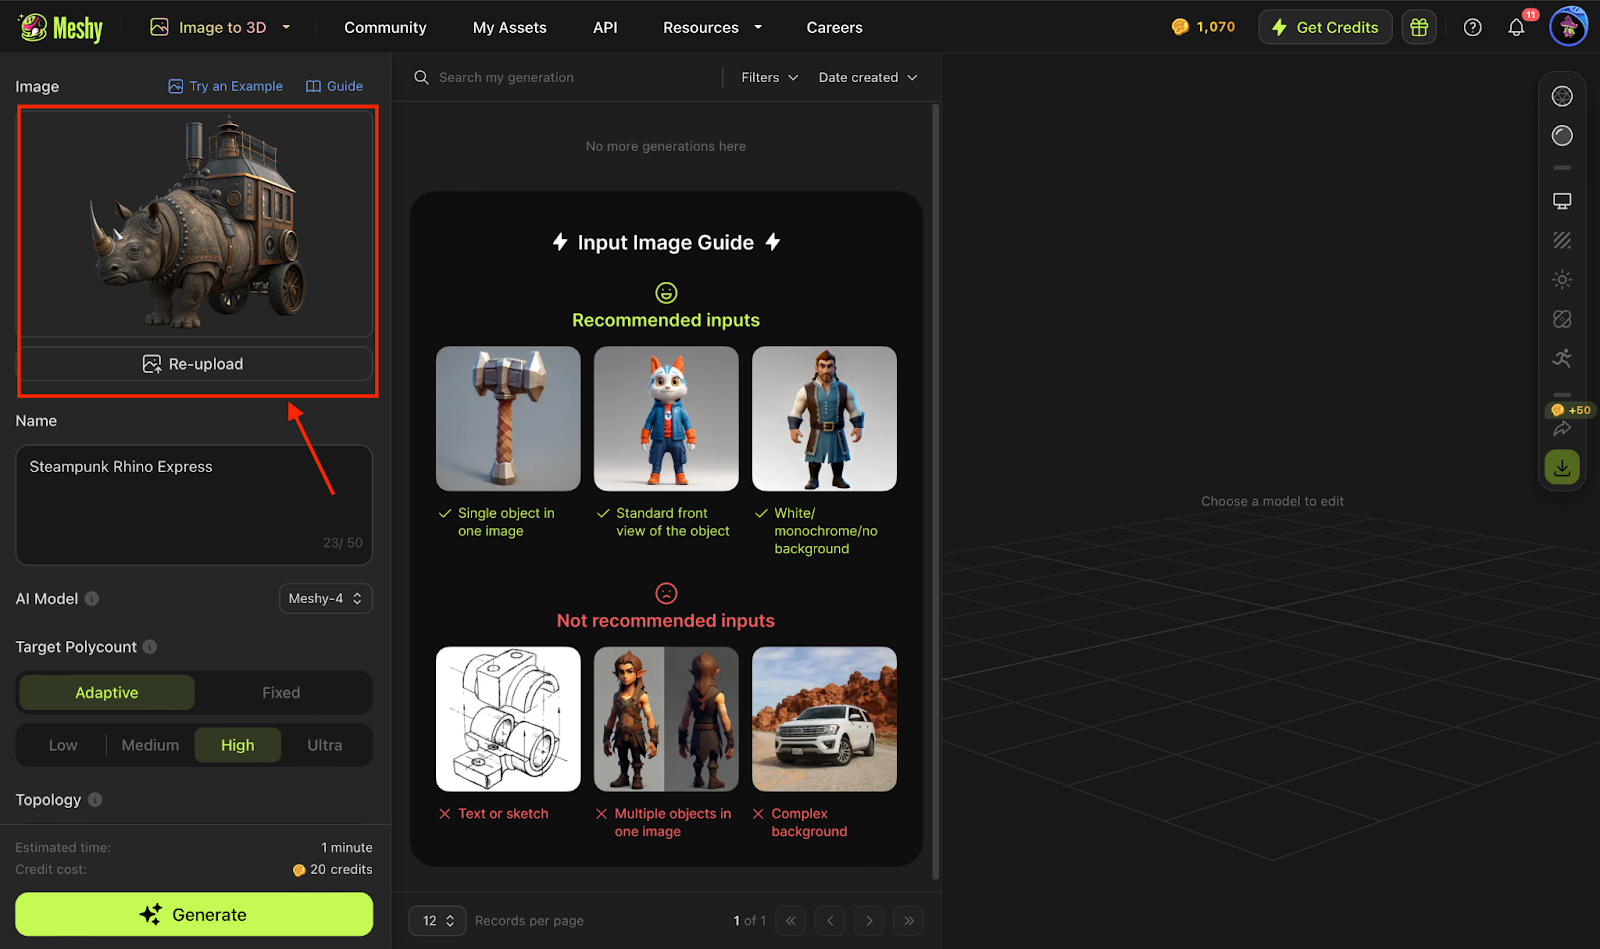
Go to Meshy’s “Image to 3D” tool and upload your chosen JPG or PNG image. Meshy’s platform makes it easy by handling the complex conversion automatically.
Step 3: Preview and Download Your Model
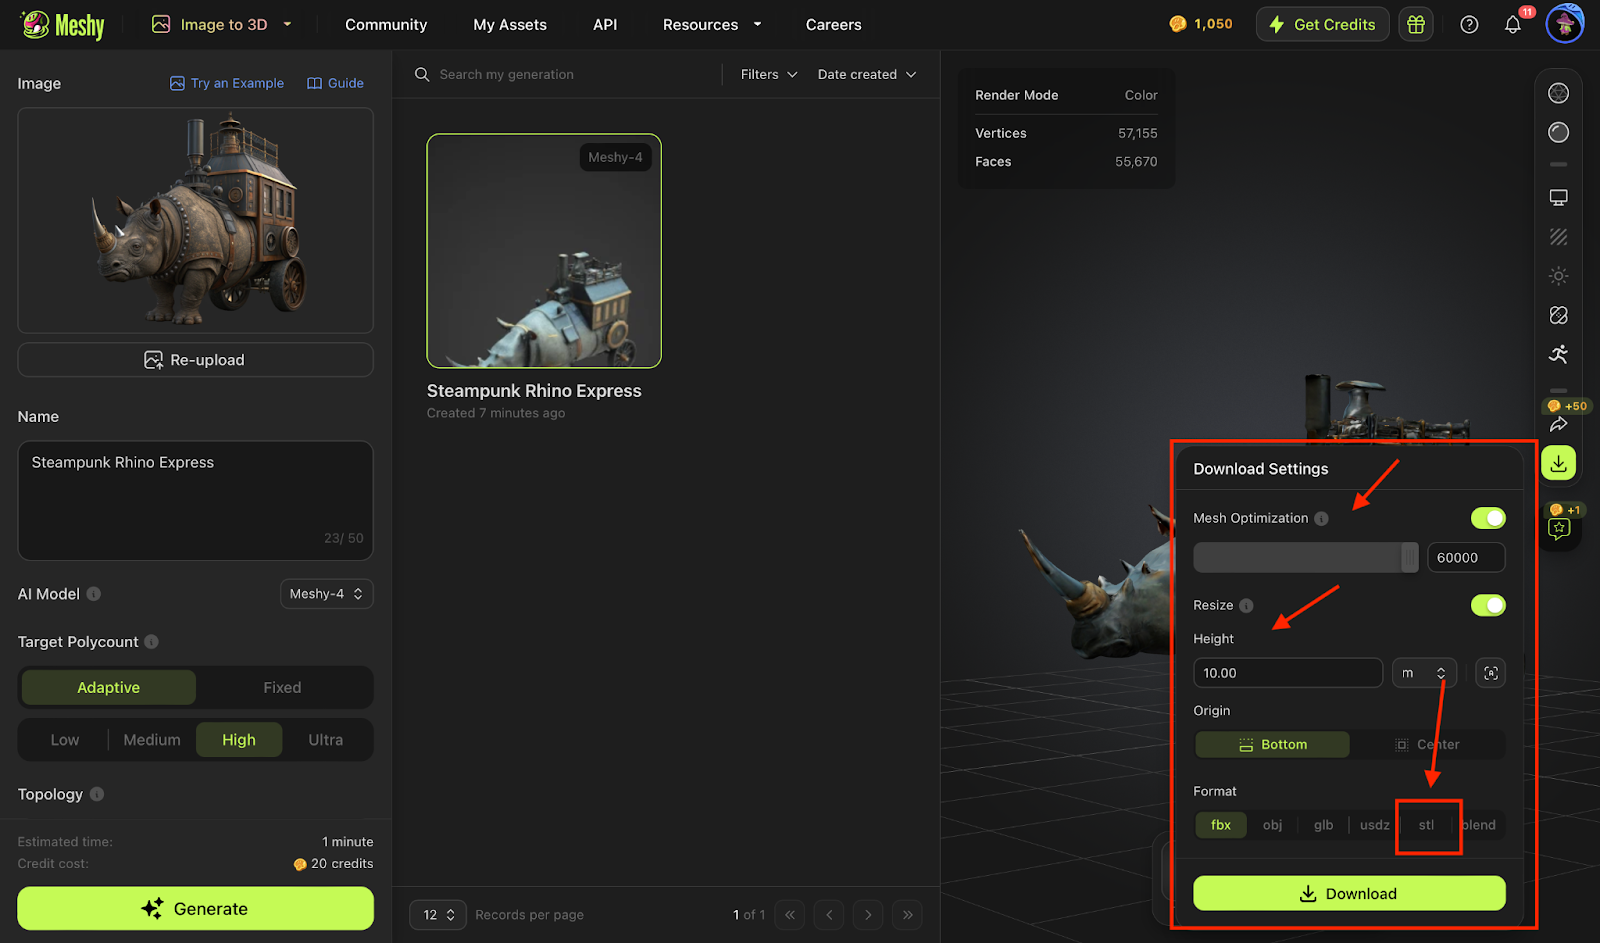
Meshy provides a real-time preview of the 3D model, so you can see how your image translates into a 3D form. If needed, you can adjust the model’s polycount, topology, and other settings. Once you’re happy with it, simply download your STL file.
If you still have any troubles, here is a more detailed tutorial on how to convert a 2D Image to an STL File Using Meshy.
Preparing Your Model for High-Detail 3D Printing with Blender
To enhance the print quality of your STL file, Blender offers a range of tools for adding details that make a big difference in the final output.
Step 1: Import Your Model into Blender
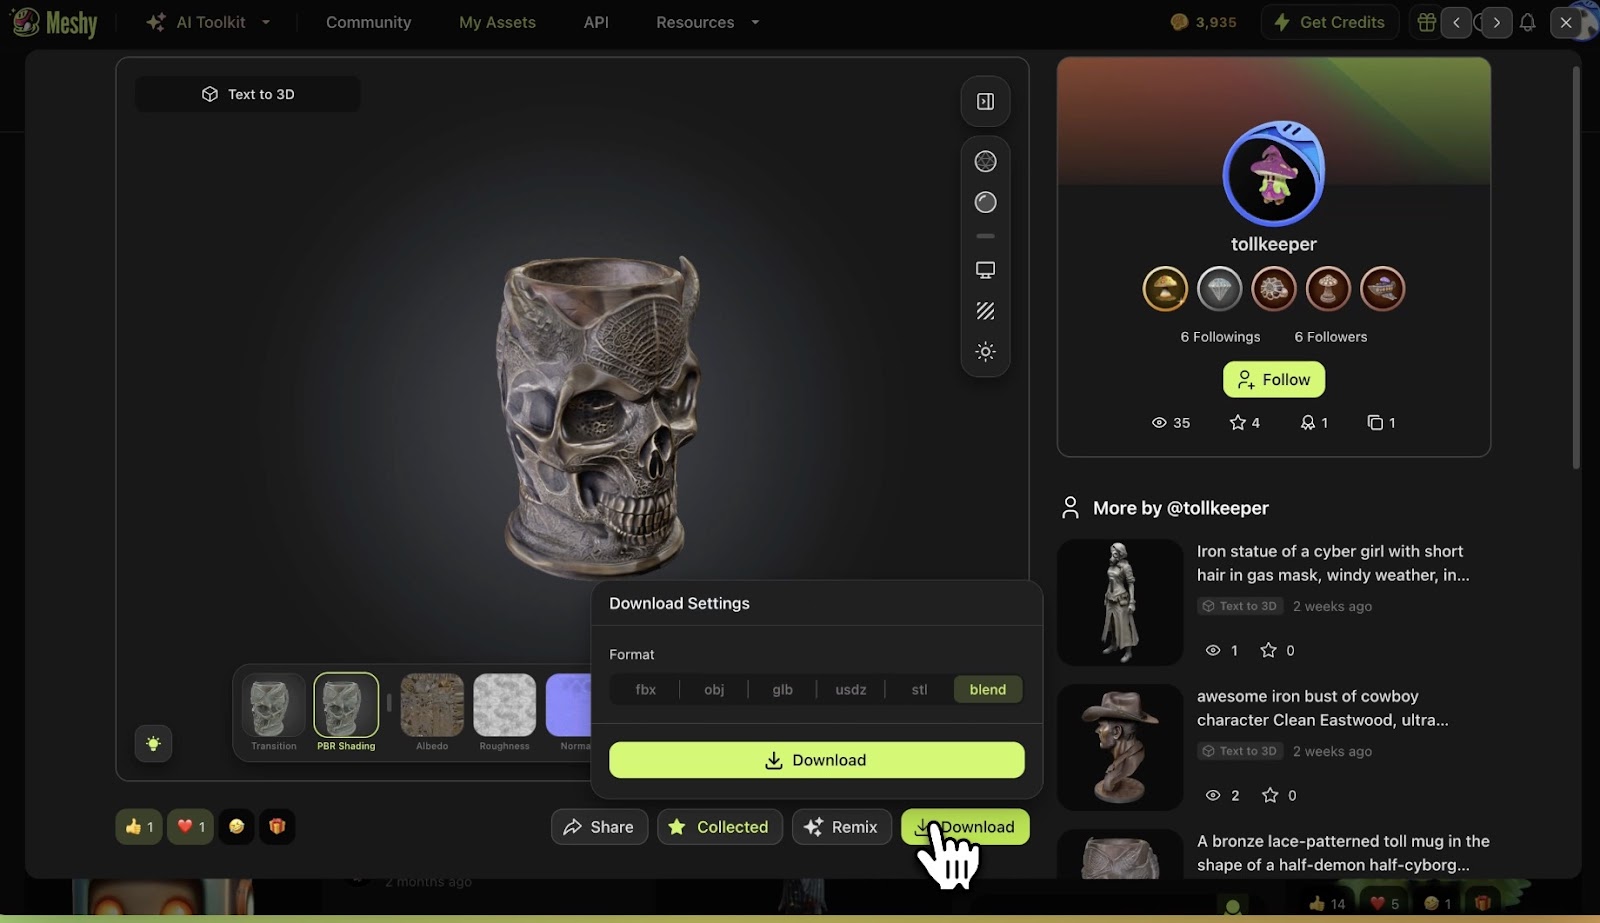
Start by downloading and opening Blender (available for free on all major platforms). Import the STL file you downloaded from Meshy and set up your workspace.
Step 2: Add Details with Blender’s Tools
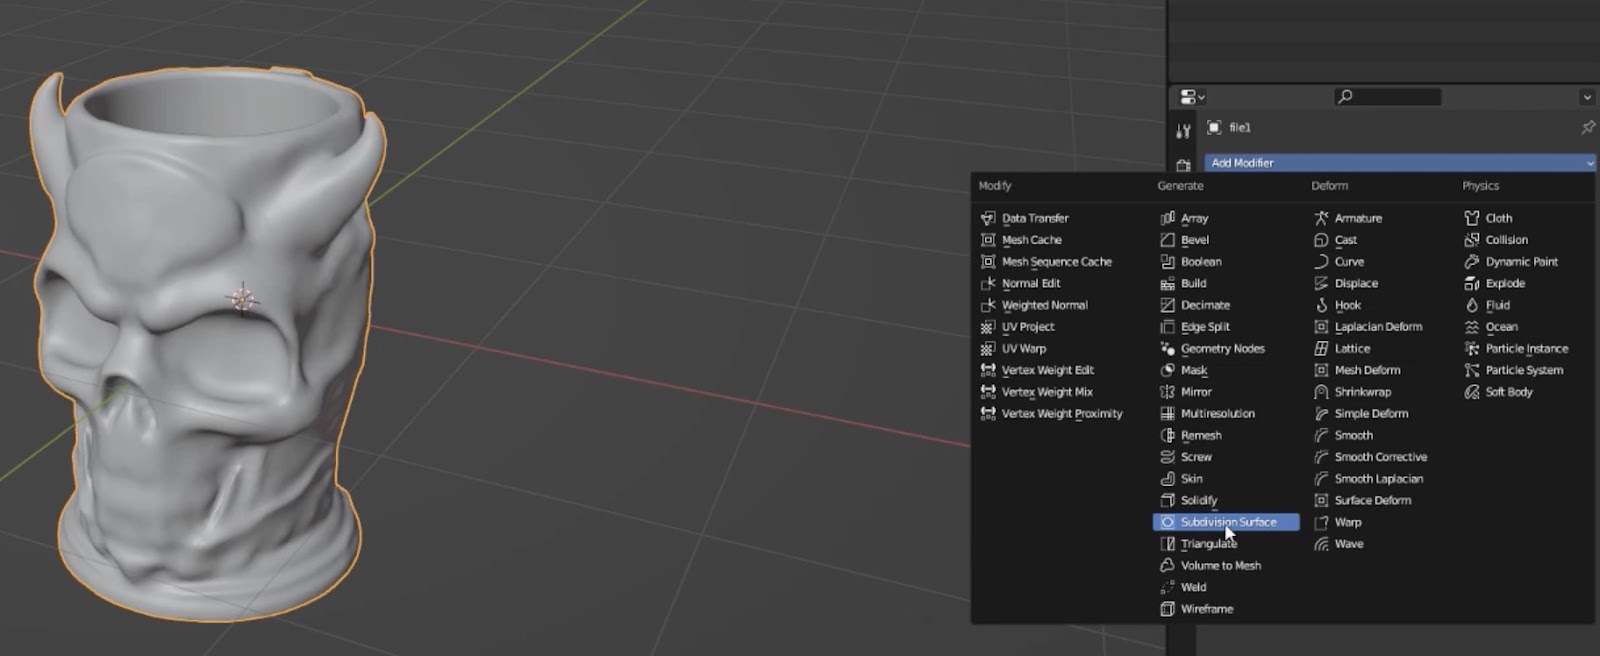
Use Blender’s modifiers, such as subdivision and displacement, to add more detail. You can even apply height maps or textures to create realistic depth on your model’s surface.
Step 3: Export Your Enhanced STL
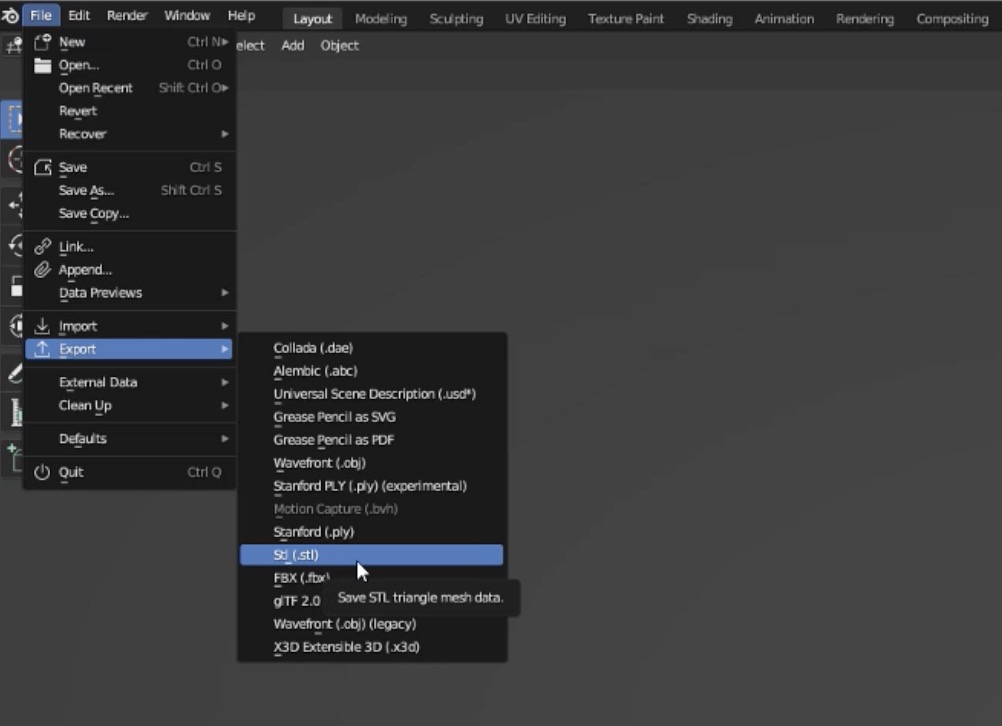
Once you’re satisfied with the refinements, export the STL file from Blender. This updated file is now ready for 3D printing with added depth and details.
Here is a more detailed version of how to prepare your models for high-detail 3D printing in Blender!
Tips for a Successful 3D Print
After conversion and refinement, some small adjustments in your slicer software can make a big difference in print quality:
• Fine-tune print settings: Adjust parameters like layer height and nozzle temperature for optimal detail.
• Ensure bed adhesion: Try using supports or brims to secure your model during printing.
• Optimize print speed and cooling: Slowing down print speed can improve detail, and adjusting cooling can help prevent issues like stringing.
With these tips, you’re set to achieve the best possible results from your 3D print.
Troubleshooting Common Issues
If you encounter problems along the way, here are a few solutions:
• Blurry or distorted details: Use a higher-quality image with fewer background distractions.
• Non-manifold edges or gaps: Use Mesh Repair tools in Blender to clean up the STL file.
• Print artifacts: Consider adjusting slicer settings like retraction and speed for smoother results.
Conclusion
Converting images into 3D-printable STL files and refining them with Blender unlocks an easy, creative pathway to 3D printing. By beginning with an AI-created image, converting with Meshy, and refining in Blender, this approach is ideal for anyone, from hobbyists to professionals.
Ready to turn your ideas into physical form? Start now to bring your creative vision to life with a 3D print!


.png)
%20(1).png)
.png)


